ESPHome on a SONOFF SlampherR2 v2.4
While there are a few articles online about this device and flashing other software on it, like for example this one on Hobbytronics or this one on Tinkerman, I couldn't find any resources on recent versions of this device. Hobbytronics has a v2.0, Tinkerman has an even older v0.2, and what I got in the mail was a v2.4.
I'll assume that you already know the basics about ESPHome and flashing things over a serial connection, so I'll reduce this to what pins are connected to what and a quick sample config.
Soldering time!
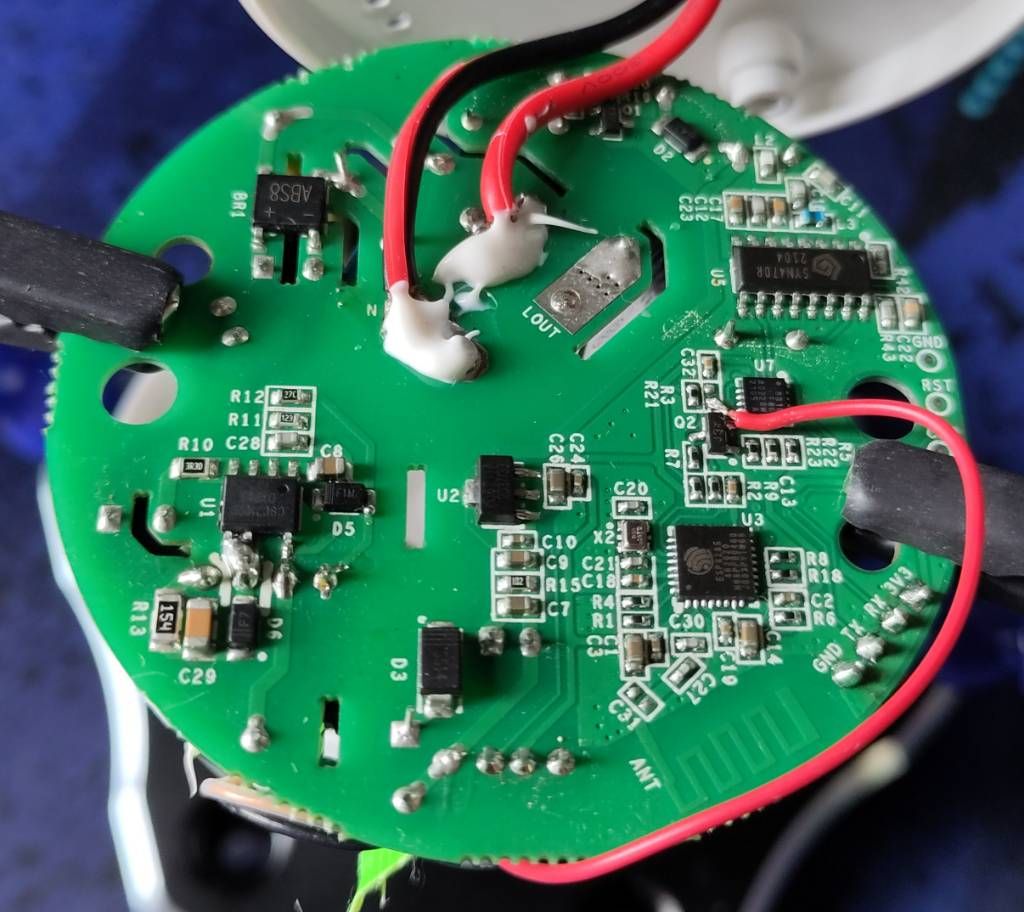
As is common with SONOFF devices, you'll find GND, TX, RX and 3V3
exposed on the board pretty easily. In the picture below, you can find them in
the bottom right. Solder a pin header to those, pointing downwards so that they
don't interfere with the casing.
A bit harder to find is GPIO0: It's available either directly on the chip, or
if you want to actually want to solder a lead to it like I did, it's available
on one of the pads where the resistor R3 would possibly be (it's not present
on my board). You can see this where the small red lead is connected on the
picture below.

ESPHome config
The pin documentation on the generic SONOFF page is apparently still accurate for newer versions of this board. Put into an ESPHome config, this is what I came up with:
esphome:
  name: slampher

esp8266:
  board: esp8285

binary_sensor:
  - platform: gpio
    pin:
      number: GPIO0
      mode:
        input: true
        pullup: true
      inverted: true
    id: button_1
    on_press:
      then:
        - light.toggle: light_1

output:
  - platform: gpio
    pin: GPIO12
    id: relay_1

light:
  - platform: binary
    name: Light
    id: light_1
    output: relay_1

status_led:
  pin:
    number: GPIO13
    inverted: yes
I'm not 100% sure this config is completely correct, but controlling it from Home Assistant works, and toggling the lamp using the button also works, so this is good enough for me.